WINDOWS
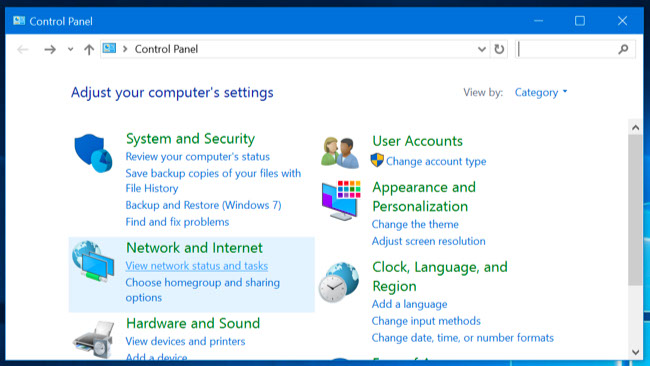
- Open the Control Panel. On Windows 10 or 8.1, you can do this by right-clicking the Start button and selecting “Control Panel”.
- Click “View network status and tasks” under Network and Internet.
- Click the name of your connection to the right of “Connections” at the top-right corner of this page
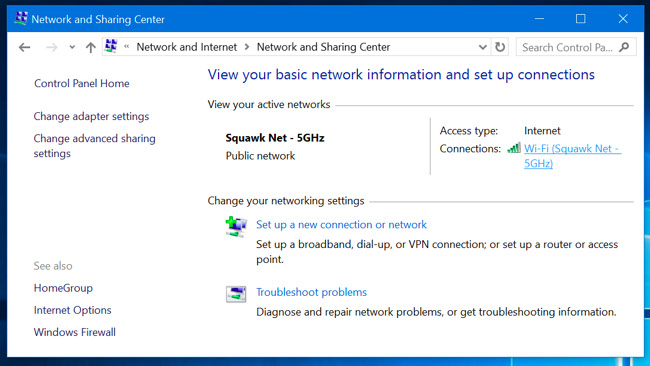
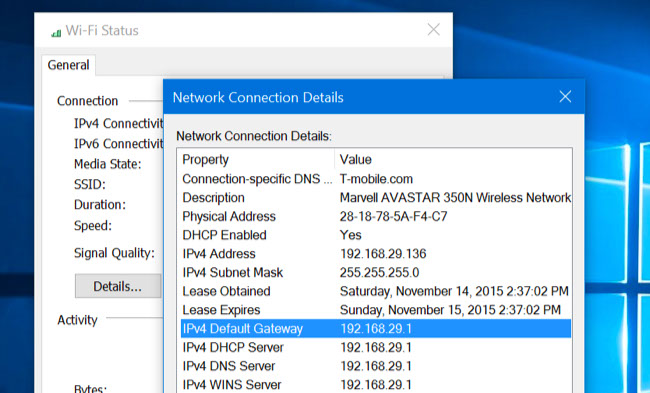
- Click the “Details” button in the window that appears and look for the router’s IP address to the right of “IPv4 Default Gateway”.
MAC OS X
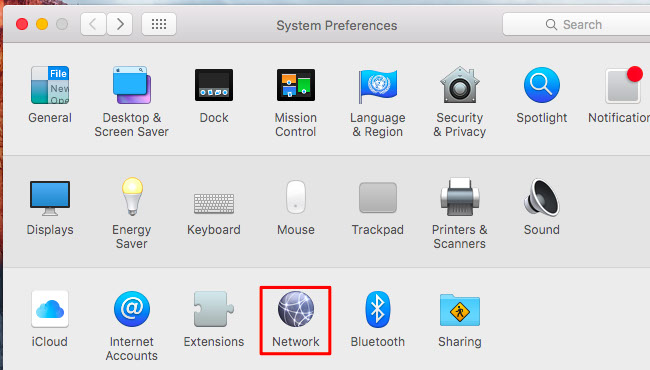
- Click the Apple menu on the bar at the top of your screen and select “System Preferences”. Click the “Network” icon.
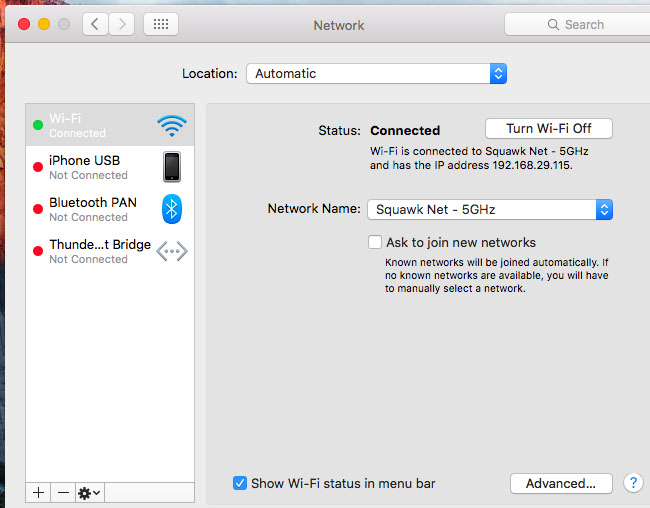
- Select your network connection — for example, Wi-Fi or a wired ethernet connection — and click the “Advanced” button at the bottom of the screen.
- Click the “TCP/IP” tab. You’ll see your router’s IP address displayed to the right of “Router”.
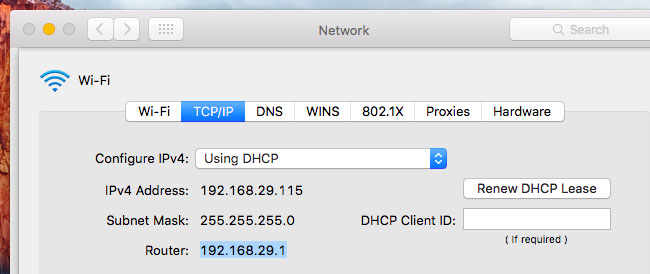
IPHONE
Open the “Settings” app, tap “Wi-Fi”, and tap the name of your Wi-Fi network. You’ll see the router’s IP address appear to the right of “Router”.
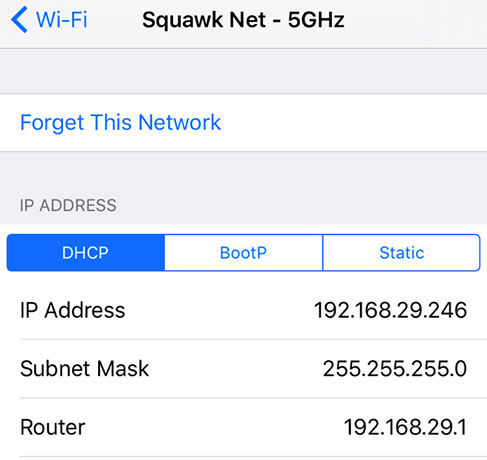
ANDROID
- Download and install Wi-Fi Analizer.
- Open the app, tap the “View” menu, and select “AP list”. At the top of this screen, you’ll see a “Connected to: [Network Name]” header. Tap that and a window will appear with more information about your network. You’ll find the router’s address to the right of “Gateway”.
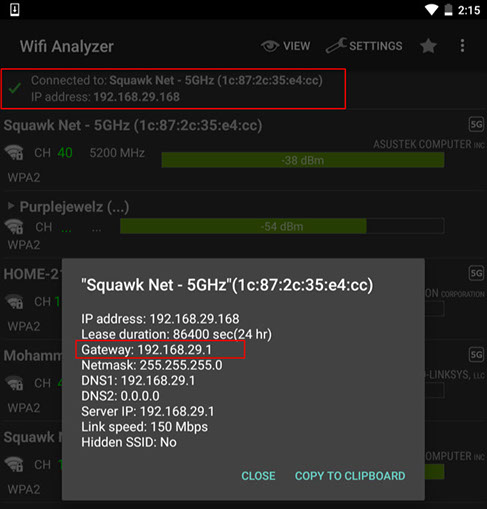
CHROME OS
- Click the notification area at right side of your taskbar, click the “Connected to [Network Name]” option in the list, and click the name of the wireless network you’re connected to.
- Click the “Network” tab when the network information appears and look at the address to the right of “Gateway”.
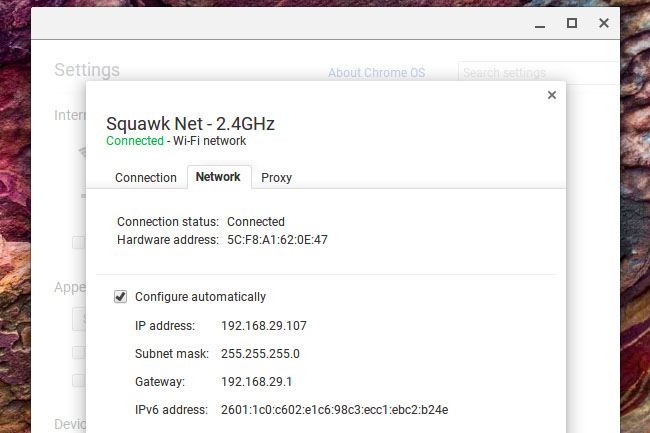
LINUX
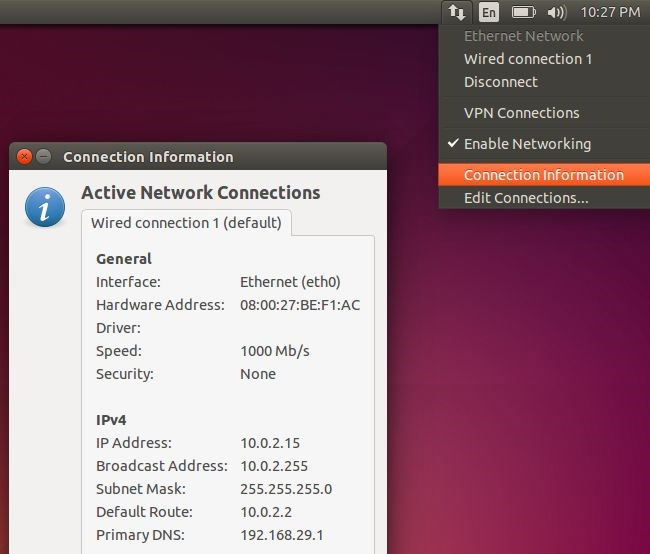
This information is usually quite easy to find from a Linux desktop, too. Most Linux desktops will have a network icon in their notification area. You should usually be able to click this network icon and select “Connection Information” — or something similar. Look for the IP address displayed next to “Default Route” or “Gateway”.
