If you want to change the ID of your ismartgate wireless sensors please follow the instructions below:
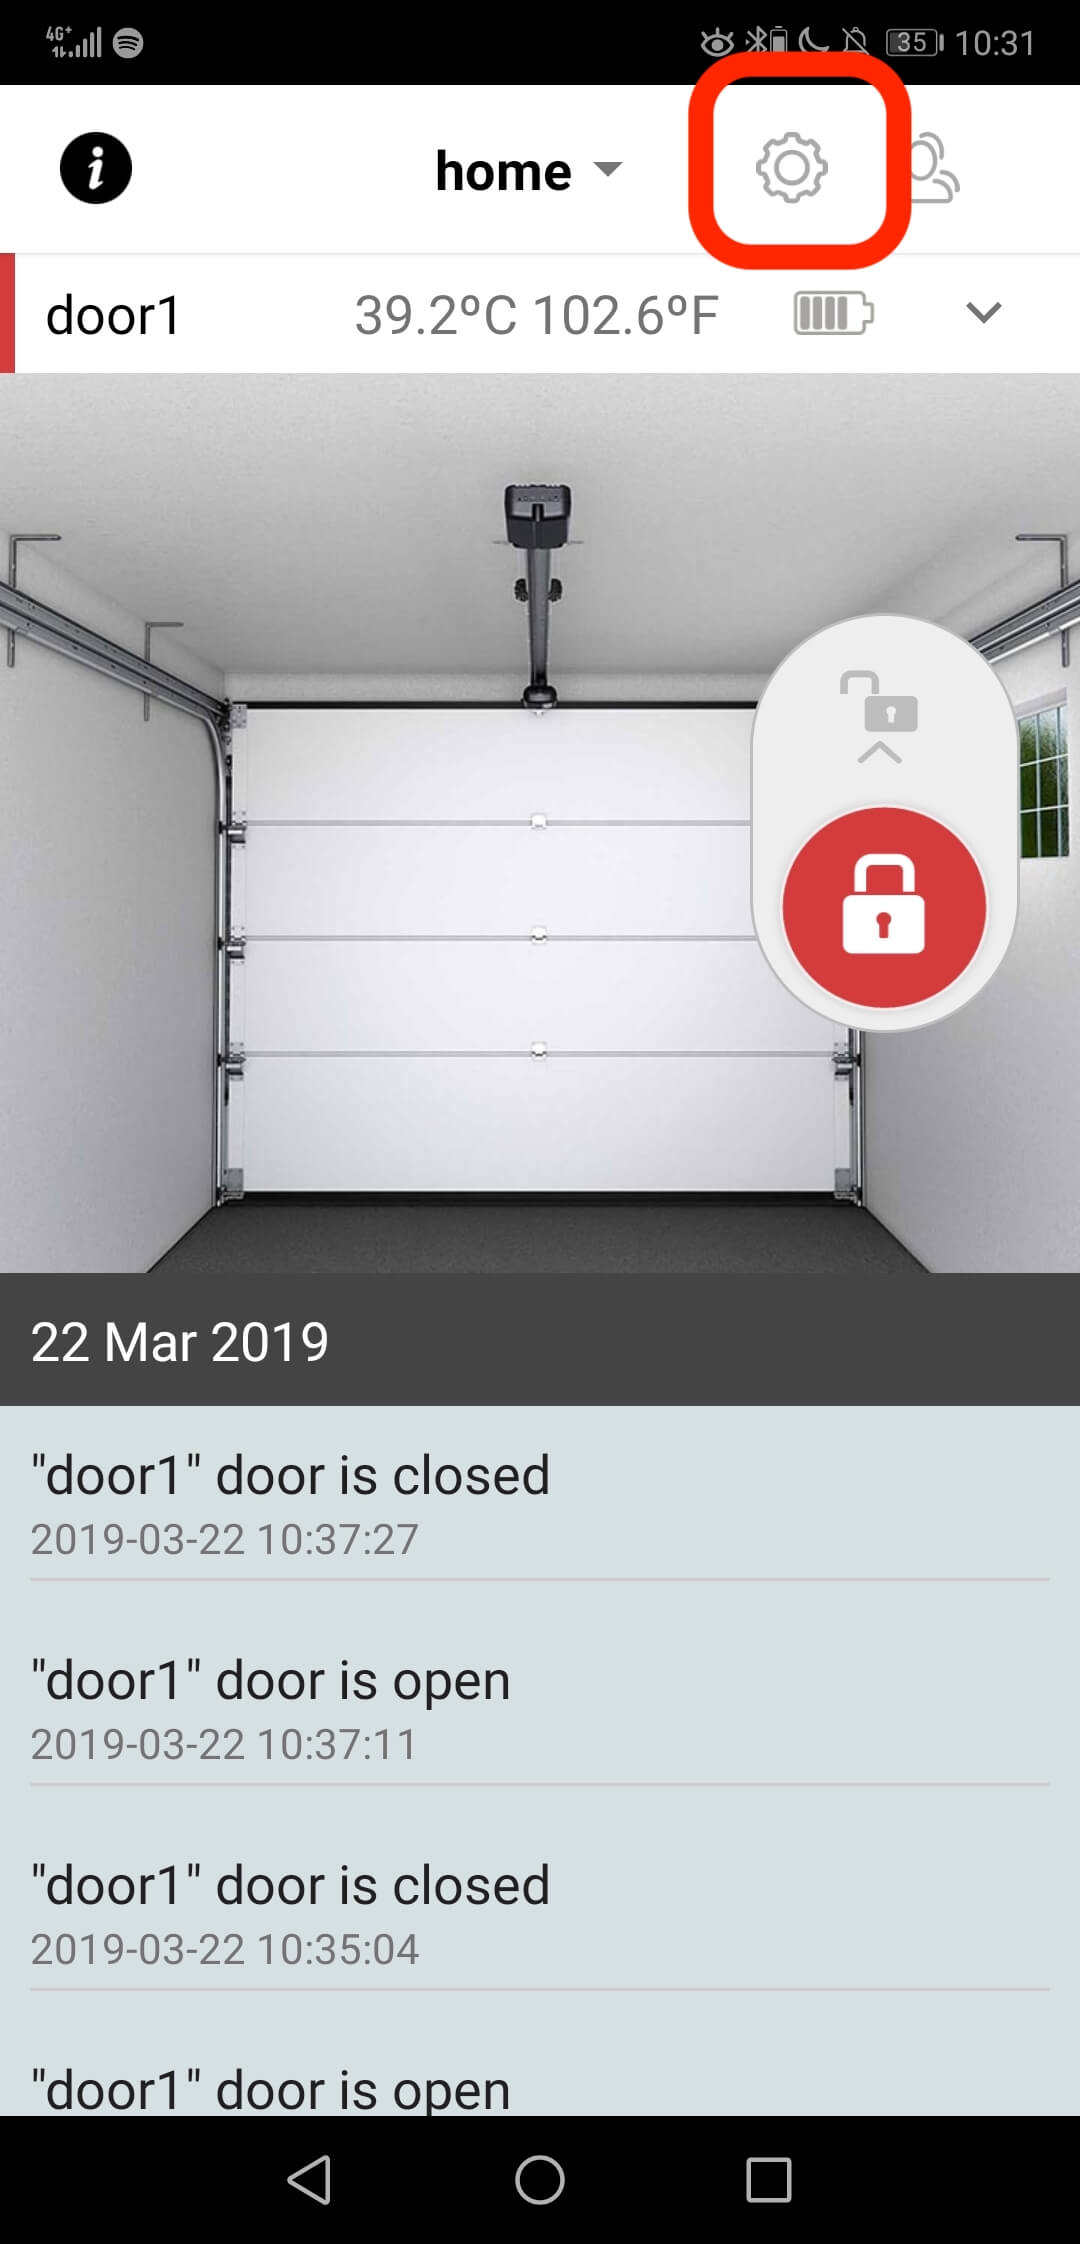
- Open your ismartgate app
- Go to Settings
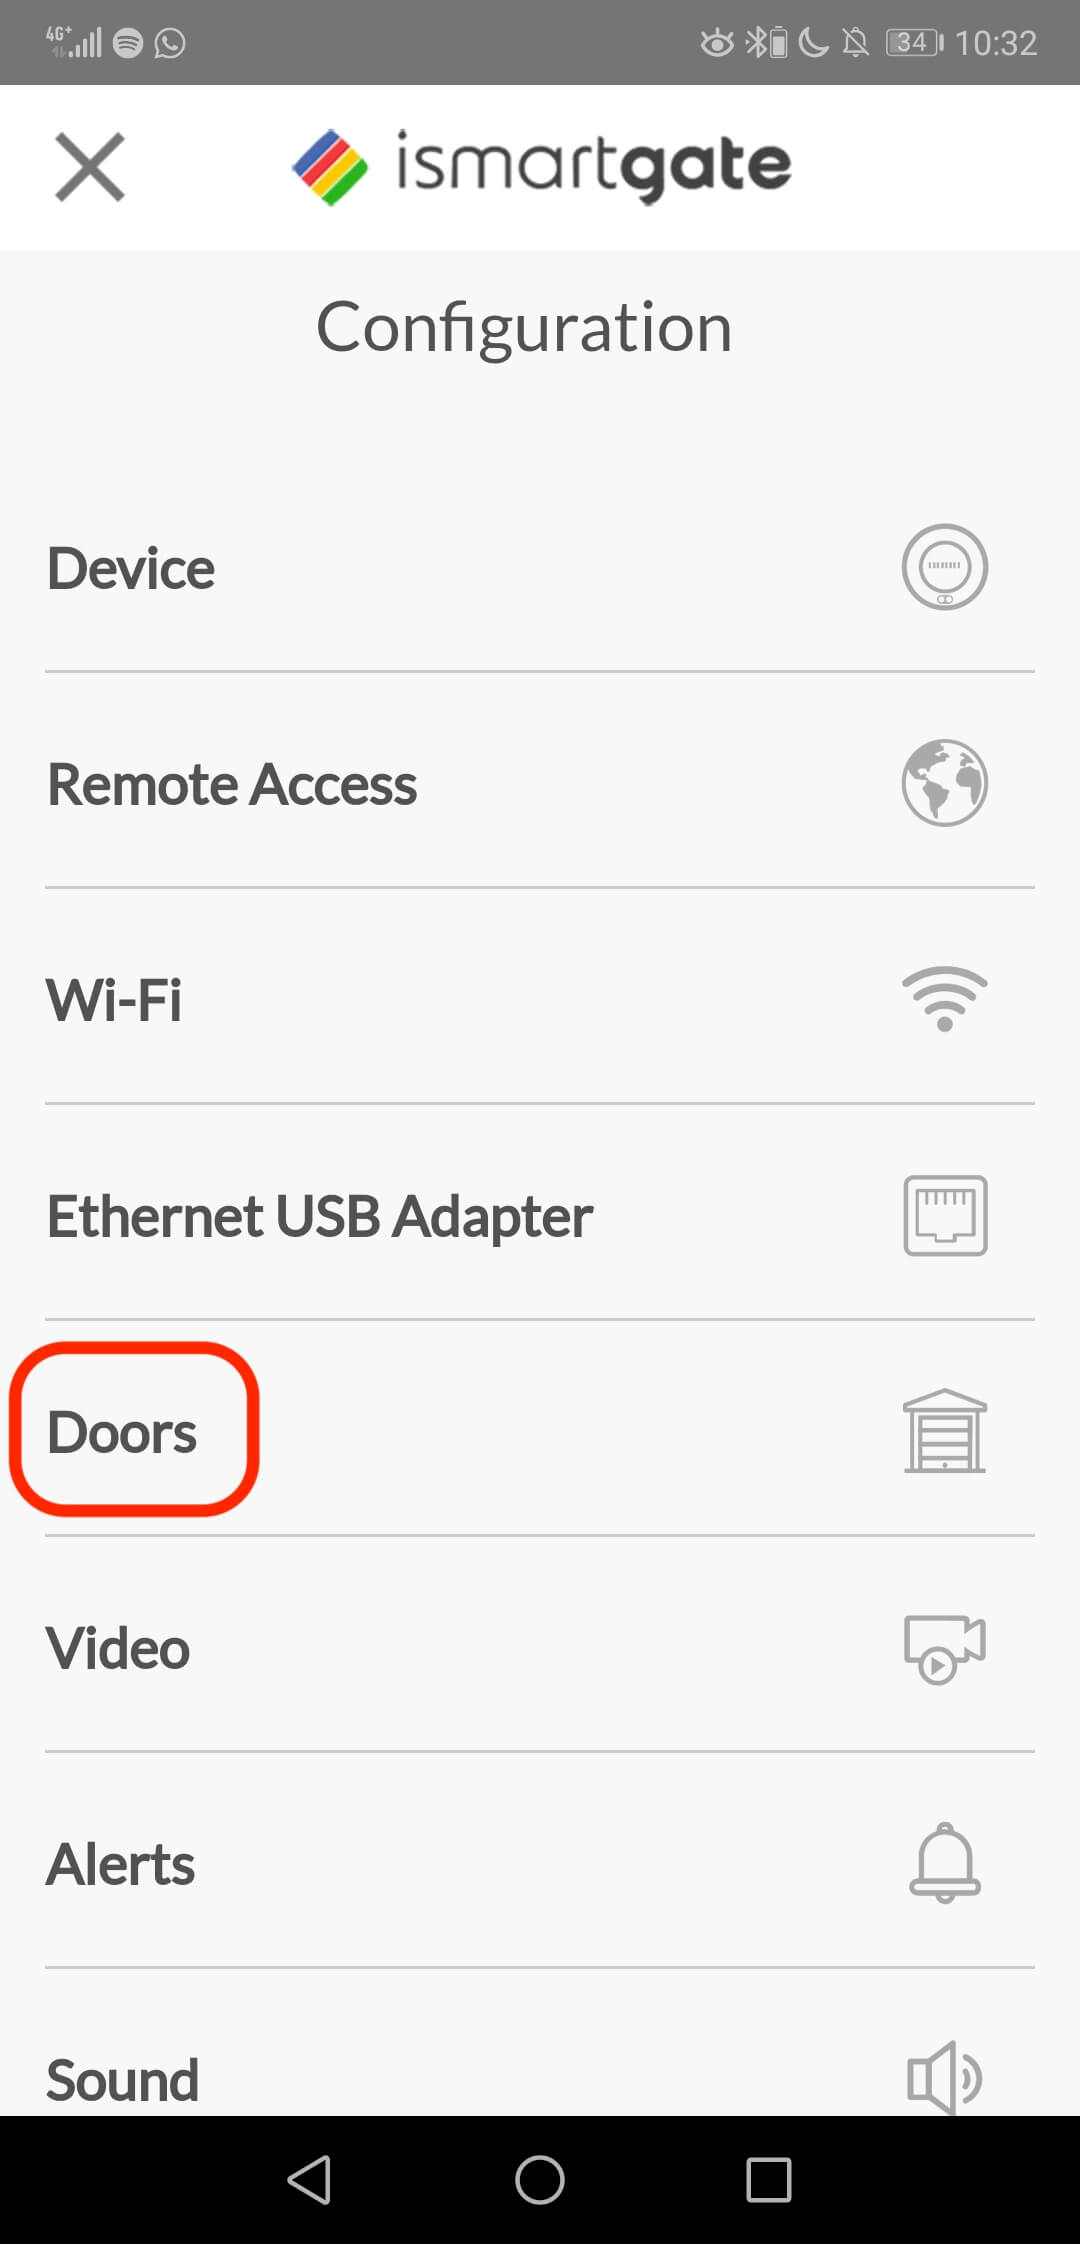
- Select the option Doors
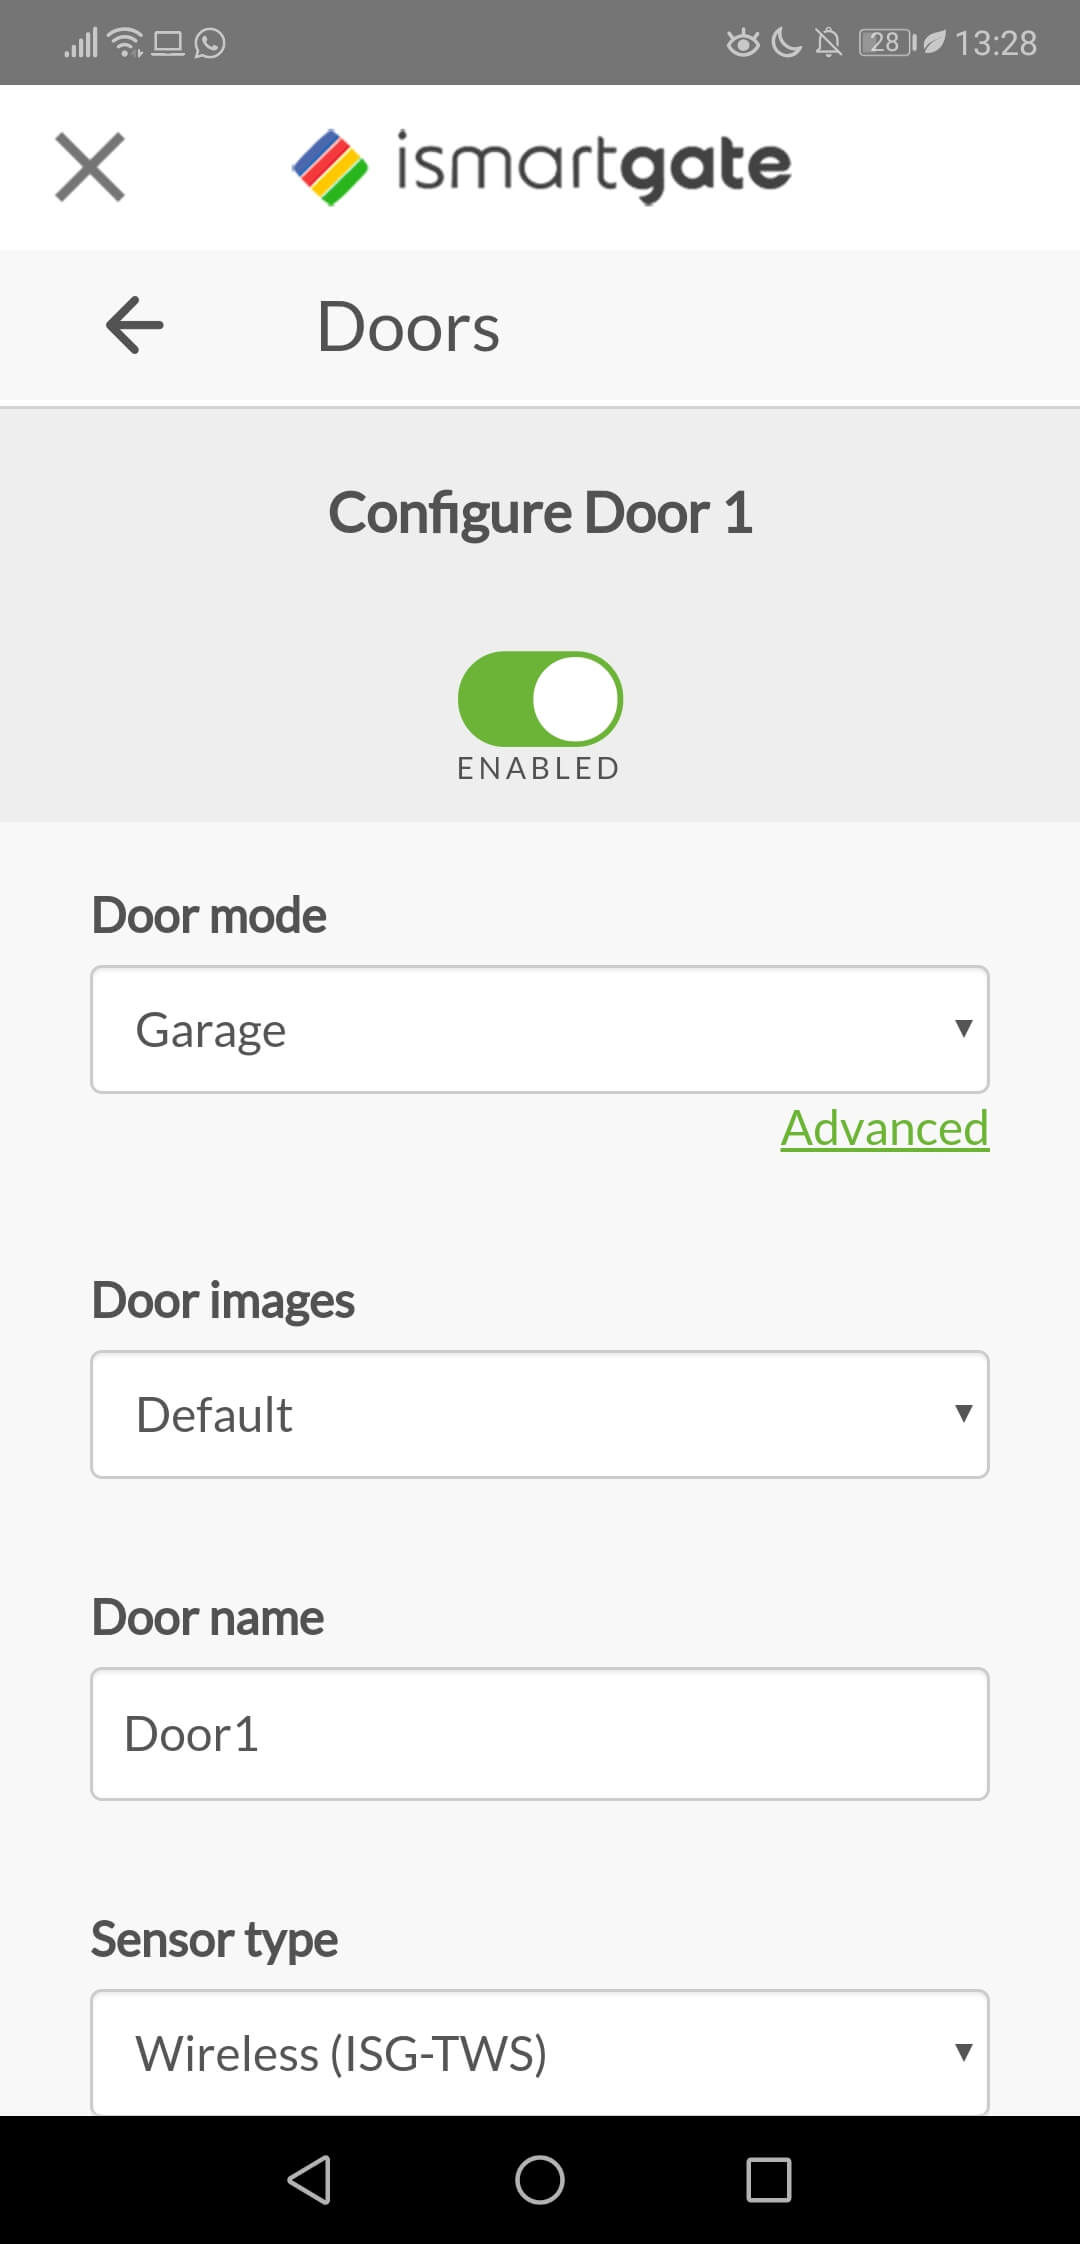
- Scroll down in this page to see the sensor configured.
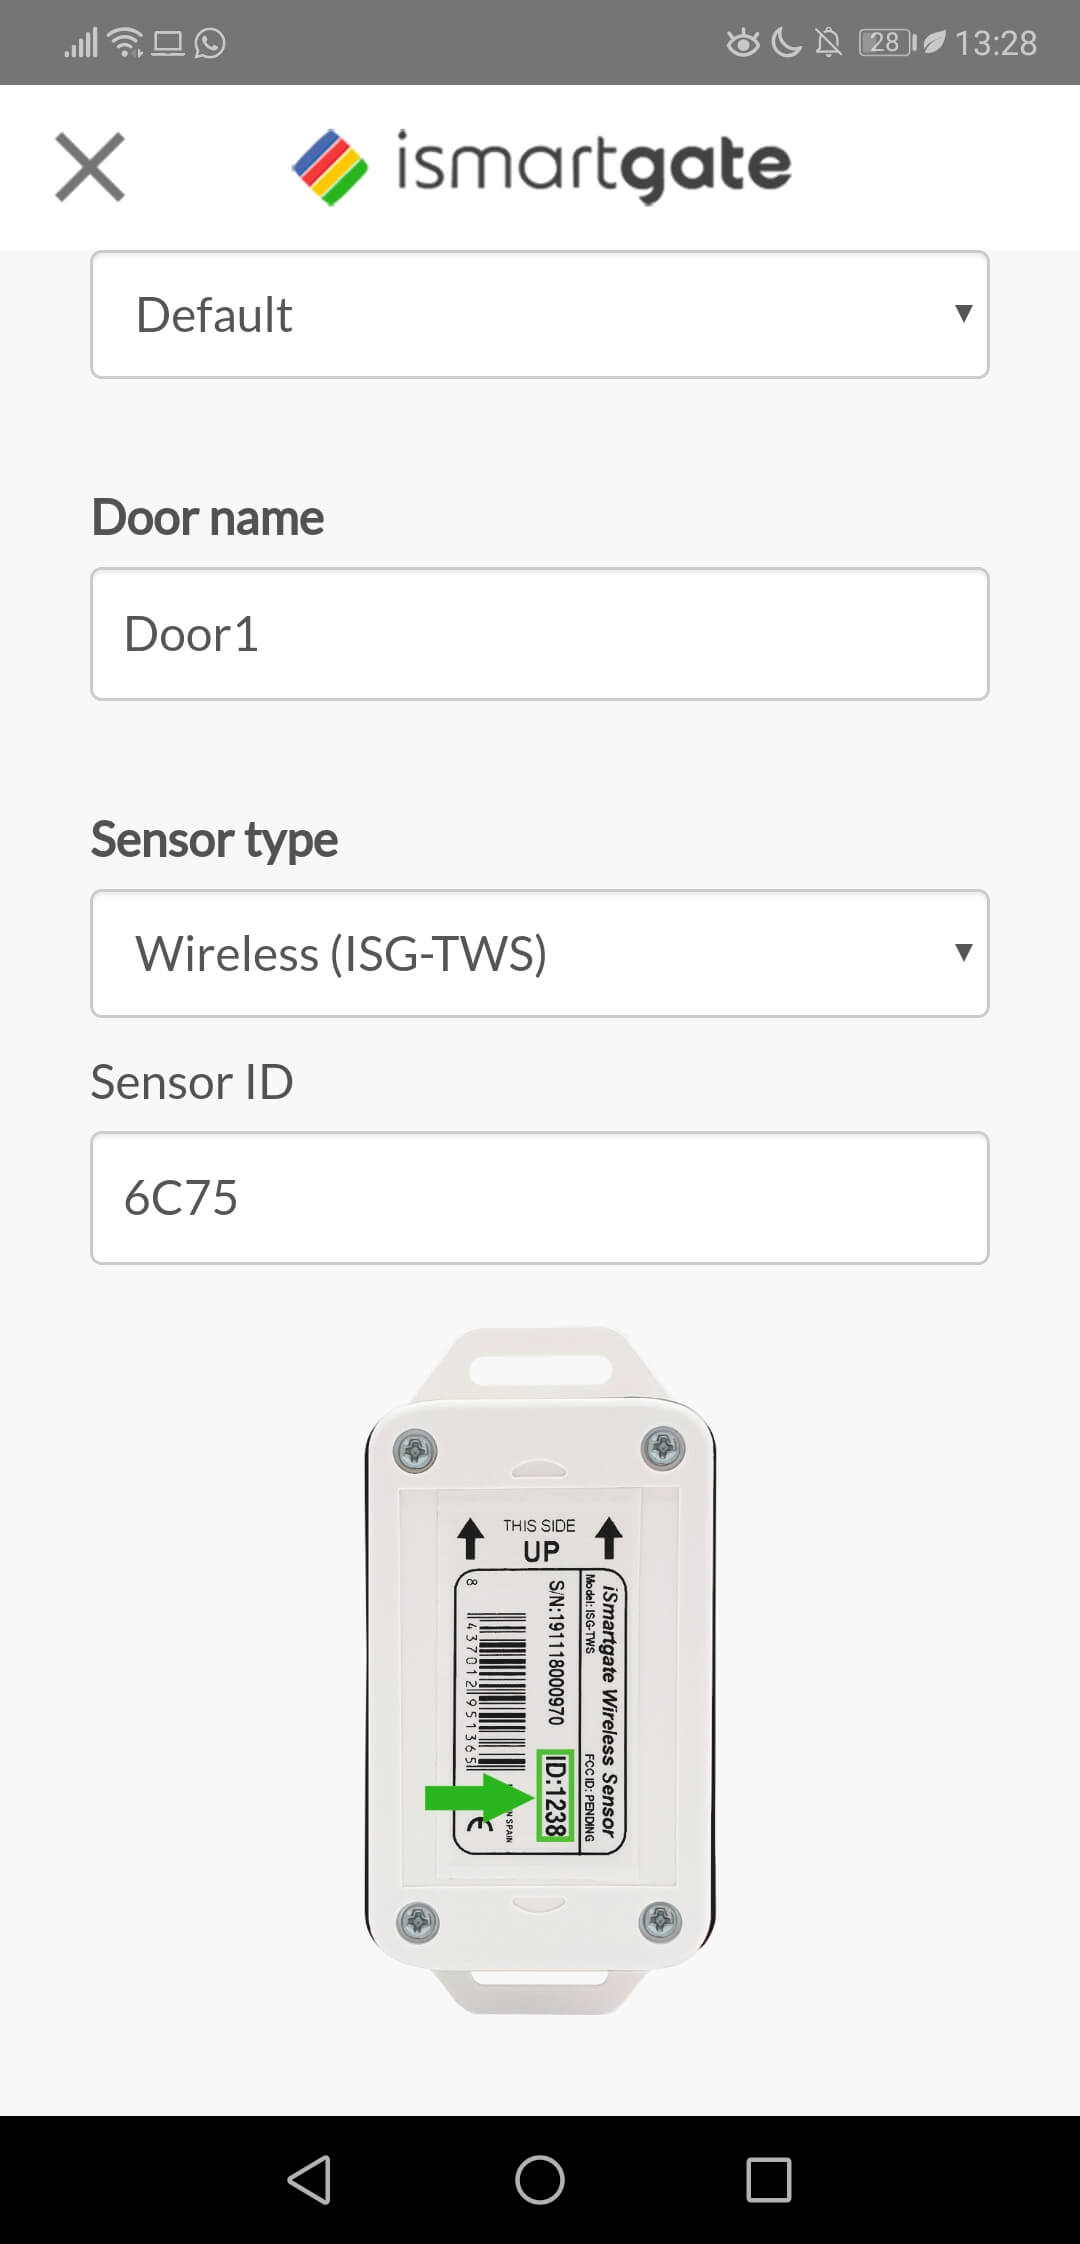
- Check the ID in the sticker of your sensor and introduce it here.
- Scroll down and press update.
In case you have any issues or questions please do not hesitate to contact us at support@ismartgate.com
